Quick answers
What is a tandem crane lift?
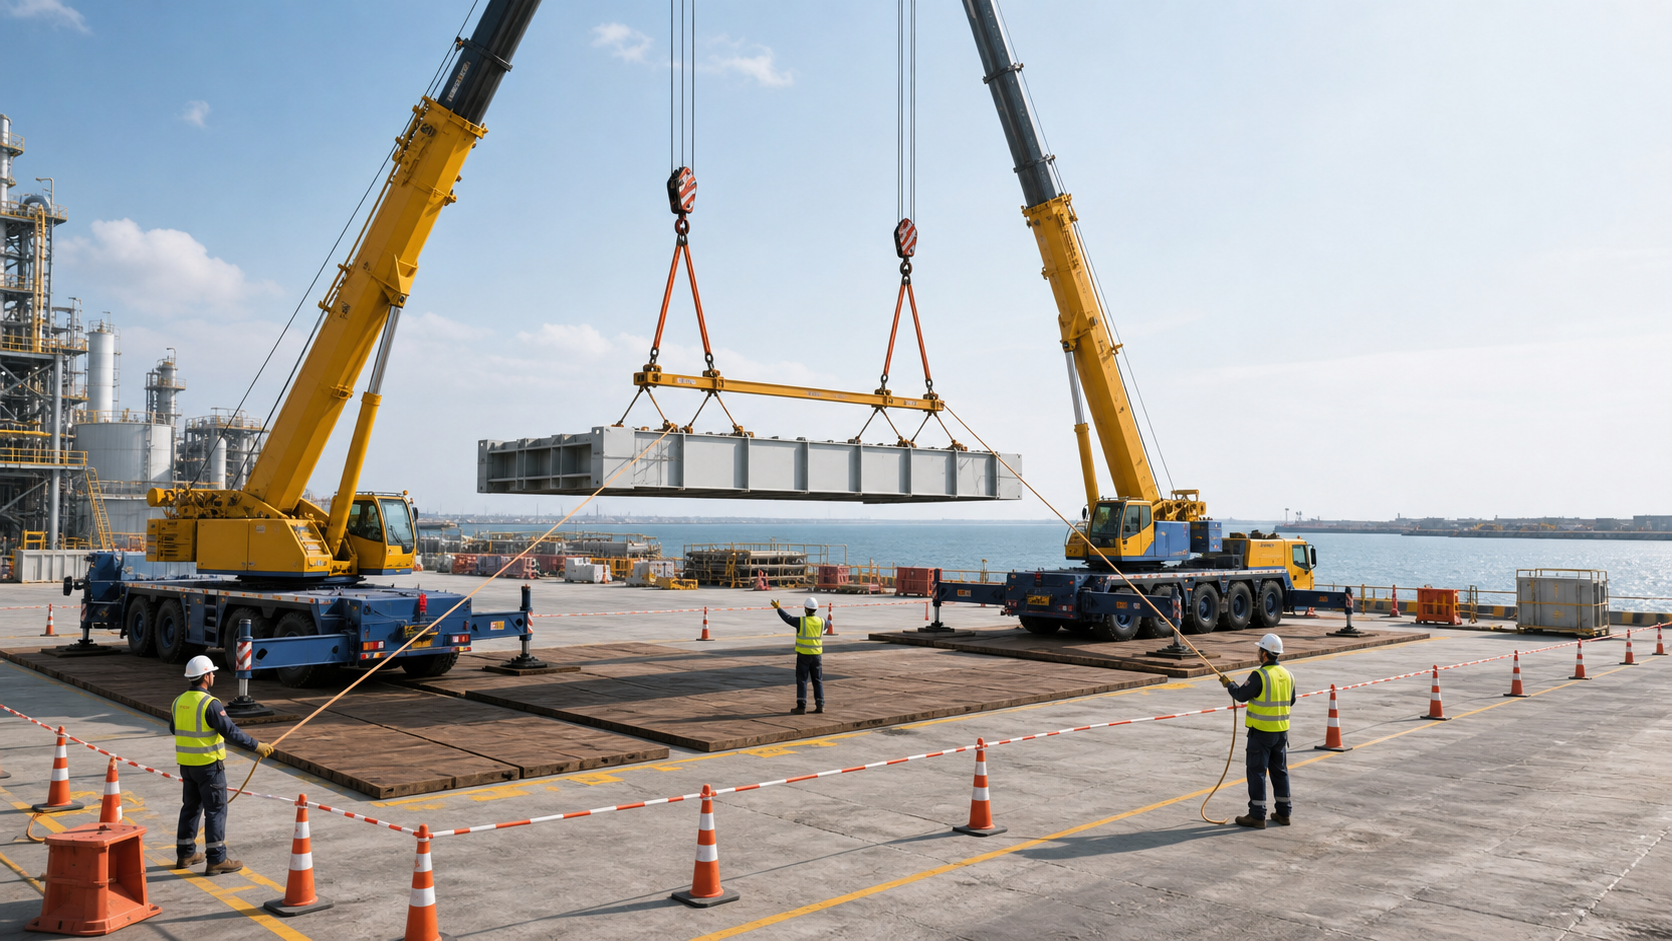
A tandem lift uses two or more cranes to support one load. It is treated as a complex lifting operation that needs a written plan by a competent person, not a routine two-hook variation.
Does each crane carry half the load in a tandem lift?
Not automatically. Each crane's share depends on the centre of gravity, hook positions and rigging geometry, and it can change when the load tilts, rotates, moves through different radii or meets unequal hoist speed.
Who should give commands during a tandem crane lift?
One competent lift director should control the operation and have authority to stop it, using a tested radio channel and agreed signals. Conflicting commands are a hazard, but anyone who sees immediate danger should be able to call stop.
What to do if something goes wrong mid-way through a tandem lift?
Stop movement smoothly if conditions permit, avoid improvised corrective movements and keep the exclusion zone clear. Lower to the planned safe position only when authorised, then recalculate and rebrief before resuming.
Tandem crane lift safety: 12 essentials for a critical-lift plan
Sometimes one crane is not enough. The load is too heavy, too long or has to be turned in the air, so the site brings in a second crane. That can solve the problem. But it also ties together two machines, two operators and one shifting centre of gravity into a single system where a small mistake can bring everything down.
The UK Health and Safety Executive (HSE) treats tandem lifts using more than one crane as complex operations that need detailed planning by a competent person. ILO guidance on dock work says such lifts should be used only when there is no other way, and should be directly supervised and carefully planned.
In India, lifting at work falls under the Occupational Safety, Health and Working Conditions Code, 2020, in force from 21 November 2025, which replaced the Factories Act, 1948 and other labour laws. During the changeover, existing rules such as the Building and Other Construction Workers Central Rules, 1998 continue to apply, along with state rules and BIS codes such as IS 13367 (Part 1) on the safe use of cranes. Check which rules apply to your site. The planning steps below follow the HSE, ILO and US OSHA guidance listed at the end.
Why tandem lifts are different
In a single-crane lift, one hook carries the whole load. In a tandem lift, the force on each hook keeps changing when the load:
- tilts
- rotates
- moves sideways
- passes through different radii
- is hoisted faster on one side than the other
- is pushed by the wind
- shifts inside, as liquids or loose parts move
- loses one rigging connection
A 100-tonne load does not automatically put 50 tonnes on each crane. The real share depends on the centre of gravity and the geometry at that moment, and it can change in seconds.
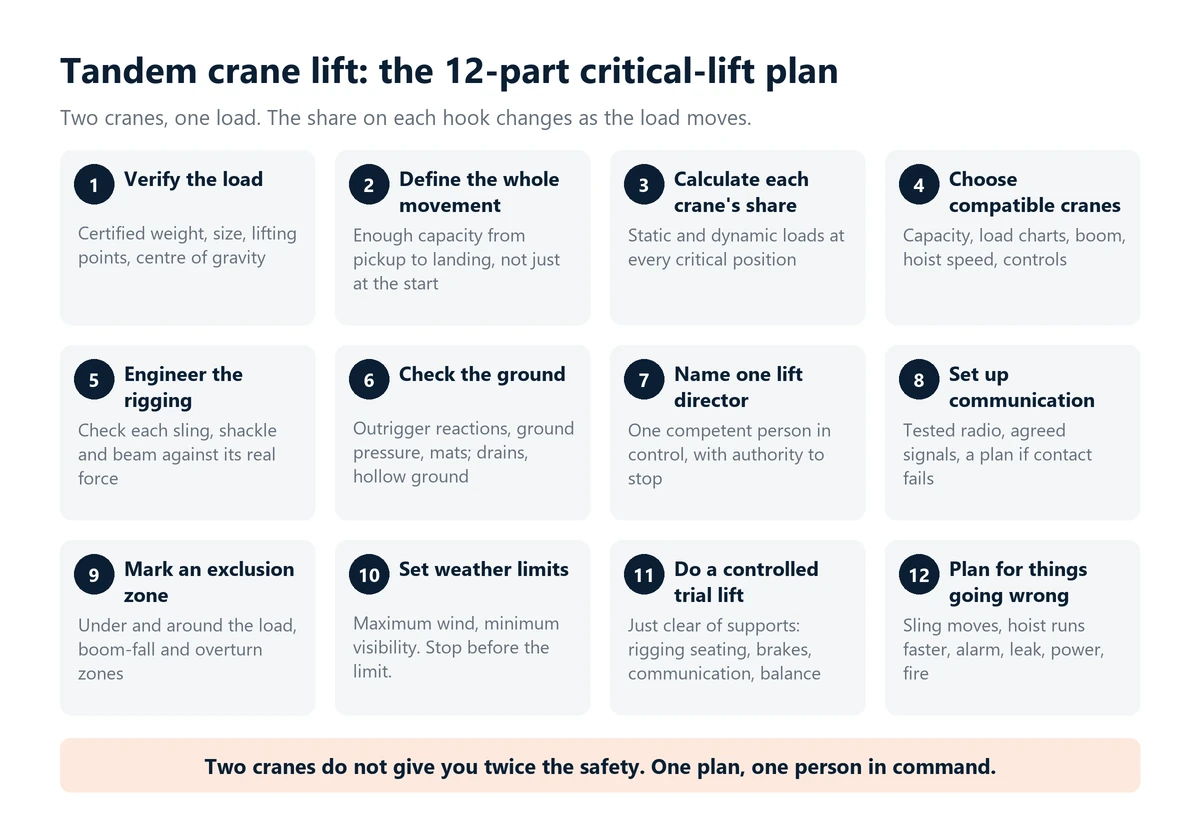
The 12-part critical-lift plan
1. Verify the load
Confirm the certified weight, dimensions, lifting points, centre of gravity and whether anything inside can move. “Approximately” is not good enough for a heavy engineered lift.
2. Define the whole movement
Plan the pickup, the clearance, slewing, travel, hand-over, landing and removal of the rigging. Each crane must have enough capacity through the entire path, not just at the start.
3. Calculate each crane’s load share
Work out the static and foreseeable dynamic loads at every critical position. Include the weight of the rigging, hook blocks and accessories.
4. Choose compatible cranes
Compare capacity, load charts, boom configuration, hoist speed, controls, reeving and how each crane behaves. Cranes that respond similarly are easier to coordinate, but that does not replace engineering.
5. Engineer the rigging
Specify the slings, straps, shackles, spreader beams, sling angles and edge protection. Check every component against the force it will actually carry.
6. Check the ground and supports
Calculate outrigger reactions and ground-bearing pressure, and use mats or engineered supports of the right size. Look for quay edges, underground services, drains and hollow ground.
7. Name one lift director
One competent person must control the lift and have clear authority to stop it. Two people giving orders is a hazard in itself.
8. Set up communication
Use a tested radio channel and agreed signals. Decide in advance what each operator does at once if communication fails.
9. Mark an exclusion zone
Cover the area under the suspended load, the possible swing of the load, the boom-fall radius and the overturn zone of each crane. Keep everyone who is not essential out.
10. Set weather limits
Set the maximum wind speed and minimum visibility based on the load’s surface area, the crane configuration and the manufacturer’s guidance. Stop before the limit is reached, not after.
11. Do a controlled trial lift
Where the plan allows, lift the load just clear of its supports to check rigging seating, brakes, communication and balance before going further.
12. Plan for things going wrong
Write down what to do if a sling moves, one hoist runs faster, an overload alarm sounds, a hydraulic line leaks, a crane or a vessel moves, power fails, a fire starts or the weather changes suddenly.
The most important question: what if one crane loses its share?
Every tandem-lift plan should look at what happens if one crane suddenly carries less of the load, or none of it. The other crane may suffer:
- sudden overload
- boom bending
- outrigger lift-off
- loss of stability
- unexpected load swing
- contact with structures
- rigging failure
If the plan cannot show a safe outcome or a safe way to control this, the method has to be redesigned.
Roles that must be clear
- Lift planner: develops the engineered method and identifies resources, limits and contingencies.
- Lift director or crane supervisor: controls the lift and stops it when the plan is not being followed.
- Crane operators: work within their load charts and the agreed commands, and stop when signals, conditions or loads are unsafe.
- Rigger or slinger: selects and attaches the rigging as planned and checks it is properly seated.
- Signaller or banksman: gives clear, recognised directions from a safe position.
Everyone must know who gives normal commands and how an emergency stop is called. Anyone who sees immediate danger must be able to call stop.
Red flags: do not start the lift
- The weight or centre of gravity of the load is uncertain.
- The written method does not calculate each crane’s load.
- Rigging certificates or inspection records cannot be checked.
- The crane set-up on site differs from the plan.
- The capacity of the ground or quay is unknown.
- The wind is at or near the planned limit.
- Radios or signals are unclear.
- People are still inside the exclusion zone.
- The crew has not gone through the actions for abnormal events.
- Someone is using commercial pressure to override stop-work concerns.
If something changes mid-lift
- Stop movement smoothly if it is safe to do so.
- Do not make an improvised correction.
- Keep the exclusion zone clear.
- Confirm the actual loads and the stability of both cranes.
- Lower to the planned safe position when the lift director authorises it.
- Recalculate and rebrief before starting again.
- Treat a shifted sling, a changed load angle or an unexpected alarm as a changed lift, not a small inconvenience.
Emergency and fire readiness
- Keep fire brigade access clear.
- Identify fuel, hydraulic oil, batteries and any hazardous cargo.
- Provide suitable extinguishers, but do not expect operators to fight a developed fire.
- Set out shutdown and operator escape procedures.
- Share cargo manifests and hazardous cargo details with responders.
- Never go near a burning crane without specialist control. Tyres and pressurised systems can burst violently.
- Know the site emergency number, and call 112 if anyone is hurt or in danger.
Questions to ask before you sign off
- Who engineered and approved this lift?
- What is the verified load and centre of gravity?
- What load will each crane carry at every stage?
- What stops a sling from moving?
- What happens if one crane stops carrying its share?
- Have ground and outrigger forces been checked?
- Who gives the commands?
- What is the stop signal?
- Is the exclusion zone physically barricaded?
- Where can the load be set down safely if the lift is called off?
Two cranes do not give you twice the safety. Without one engineered plan and one person in command, they give the forces twice as many ways to go somewhere nobody expected.
References
What needs attention
- Each crane's share of the load depends on the centre of gravity, hook positions and rigging, and can shift quickly
- UK HSE treats tandem lifts as complex operations needing a written plan by a competent person; US OSHA requires a qualified planner
- Capacity has to be checked along the whole path, not only at the pickup point
- Ground, outriggers, underground services and nearby structures are part of the lifting system
- One command structure, tested radios and a clear stop signal are essential
- The plan must cover what happens if one crane suddenly loses its share
Controls that reduce risk
- Confirm the exact load weight, centre of gravity and lifting points
- Draw the full path, final position and a safe set-down position
- Calculate expected and worst credible load share for each crane, including rigging
- Check each crane's capacity at every radius and stage
- Have rigging and lifting arrangements designed or checked by competent people
- Assess ground bearing, outrigger loads and underground services
- Name one lift director and record everyone's role
- Test radios, signals and the emergency-stop signal before taking load
- Barricade the exclusion zone
- Set limits for wind, visibility and lighting
- Brief the crew and do a controlled trial lift
- Agree stop-work triggers and contingency actions
Common unsafe practices
- Assuming both cranes will always carry half the load
- Using an estimated weight or centre of gravity
- Checking crane capacity only at the starting radius
- Changing boom, outriggers, counterweight, rigging or route without rechecking the plan
- Letting two people give competing commands
- Carrying on after losing radio contact, visibility or load control
- Correcting a load shift with an improvised crane movement
- Letting workers stand under the load or in the swing area